Safe Cast Removal: Cast Saw Technique & Safety
Safe removal of a fiberglass cast requires correct oscillating saw technique, planned cut lines, skin protection, and clear patient communication. This guide covers tool setup, bivalving, use of a cast spreader, handling padding/edge tape, heat and vibration control, and post-removal care.
1) Setup & safety
- PPE: thin non-latex gloves, eye/face protection; hearing protection in busy settings. Offer earplugs for children.
- Tools: clean oscillating saw, cast spreader, padding scissors/cutter, dust extraction.
- Patient briefing: the blade vibrates and doesn’t spin; short, vertical touches are safe; avoid sudden limb movement.
- Positioning: stabilize the limb; plan cut lines away from prominences, tendons, scars.
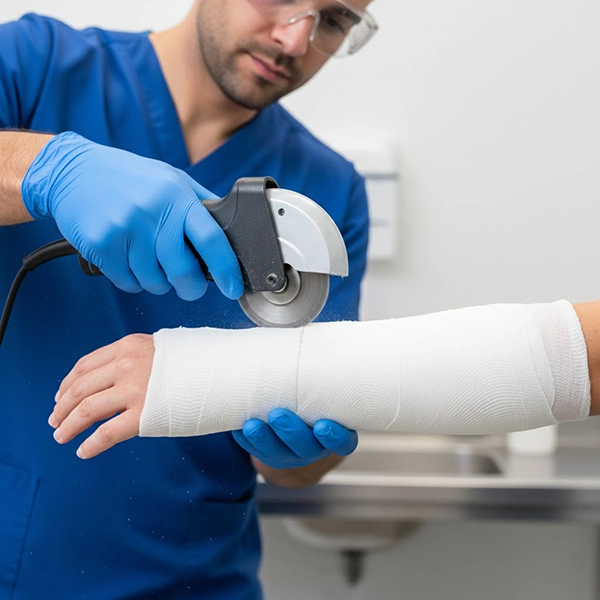
2) Saw fundamentals
- Angle & contact: blade perpendicular (~90°). Use brief 1–2 s “tap-lift” contacts to allow cooling.
- Depth control: gentle pressure; a slight “catch” sound indicates reaching padding. Do not plunge continuously.
- Heat: stop if the patient feels warmth/burning; allow cooling and ventilation.
- Dust: use suction and orient cuts away from the team/patient face.

3) Bivalving & spreader
- Cut plan: draw two longitudinal cuts on safe corridors; shift slightly medial/lateral near prominences.
- First cut: use tap-lift vertical contacts until padding is reached; pause every 2–3 cm.
- Second cut: repeat on the opposite side to free the shell.
- Spreader: insert jaws and gently pry the shell open.
- Padding: cut padding with scissors; avoid aggressive pulling on skin.
4) Final removal & edge tapes
- Release moleskin/edge tapes first to reduce adhesion.
- For semi-rigid splints, one cut plus spreading may suffice.
- Colored multi-layer casts retain heat—work patiently with more cooling pauses.
5) Pediatrics & anxious patients
- Explain sound/vibration; let them touch the inactive blade.
- Seat a parent/companion; use breathing/countdown techniques.
- Shorter contacts, more pauses, and active suction.
6) Common errors & fixes
- Over-plunging: risk to padding/skin—return to short vertical contacts.
- Hot spots: pause, vent, re-approach in short bursts; check skin.
- Cut over prominences: reroute to softer corridor; finish from the opposite side.
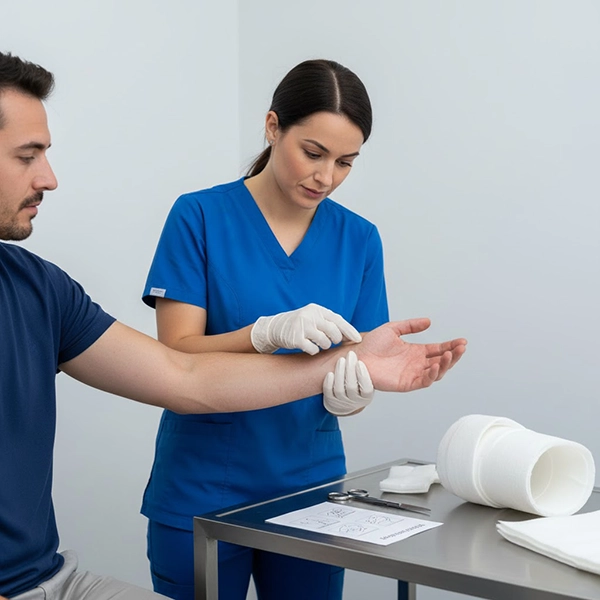
7) Post-removal care
- Skin: cleanse with lukewarm water/mild soap; moisturizer on exposed skin.
- CSM: reassess color/warmth/sensation/motion; abnormal findings → prompt review.
- ROM: begin gentle exercises per provider’s plan; report atypical pain.
- Red flags: escalating pain, numbness, blisters/ulcers, discharge, or foul odor—call the clinic.
Conclusion & CTA
Using short perpendicular contacts, planned bivalving, proper use of a spreader, and thoughtful post-care allows safe, skin-friendly cast removal. For staff training or case-specific advice, please contact our team.